Mysql Grant Privileges to One Database
Introduction to MySQL Flush Privileges
The following article provides an outline for MySQL Flush Privileges. Whenever we create a user, we assign or grant some privileges to it. These privileges include the permission to perform operations on the database and access to it. Operations such as Insert, Update, Delete, and Select can be made and granted to the user. Other than this, the privilege to Grant and Revoke can also be assigned.
After you grant the privileges to the user, to make those changes take effect, we need to either reload or restart the MySQL service which we are using. Other than that, there is one more method that can be used to make the granted privileges take the effect without restarting the MySQL service. We can make use of the flush privileges command once all the granting operations are done.
Working of MySQL Flush Privileges
If the MySQL service is started without using the option –skip-grant-tables, then all the grant table contents are read during startup itself. Further, if we grant or revoke the privileges using account-management statements indirectly, MySQL automatically detects the changes made in the grant tables, and then again the grant tables are loaded into the memory automatically. But, if we modify grant tables directly, the changes are not taken into effect until and unless you externally specify to restart or reload the MySQL service.
Direct modification of the grant tables can be done by using statements like Insert, Delete, and Update. In such cases, we can command the server to reload the MySQL server by operating flush-privileges. This operation can be performed by using the FLUSH PRIVILEGE command statement. mysqladmin flush-privileges or mysqladmin reload command can also be used alternatively to reload the MySQL service.
For the client sessions, the reloading of the grant tables takes into effect as specified below:
- Whenever the next request of the client is fired then the privileges on the columns and the tables are taken into effect.
- Whenever we use the next command of use database_name statement, all the privileges that were changed on the database are taken into effect.
- Sometimes, the name o the database is cached into the memory hence, the effect of changes may not be visible. For this, you will have to first use a different database and then use the same previous database on which you were working.
- All the changes that are made in the grant tables are related to the global settings and passwords are not affected by using the flush privileges command. For that, you will have to use a new session in the same connection.
Starting the MySQL service with the usage of –skip-grant-tables option can be very risky and insecure as none of the contents of grant tables is read and no access control system comes into effect that leads to any user login to the database and perform any of the operations he/she wishes to. To prevent this, we can flush the privileges to make the server read all the grant table contents and access control systems.
Syntax:
We can reload the grant tables in the memory by running the flush-privileges command using the following Flush statement.
FLUSH PRIVILEGES;
Examples of MySQL Flush Privileges
Given below are the example mentioned:
We will create one user and then assign certain privileges to that user and then will check from the user table whether the privileges are assigned and taken into effect properly.
Let us first, create a user named temp_user having password 123 by using the following CREATE USER query statement.
Code:
CREATE USER 'temp_user'@'localhost' IDENTIFIED BY '123';
Output:

Example #1
Now, let us check all the privileges that are assigned to the temp_user by default when it is created by querying on the user table using the following statement.
Code:
select * from mysql.user where User='temp_user' \G;
Output:
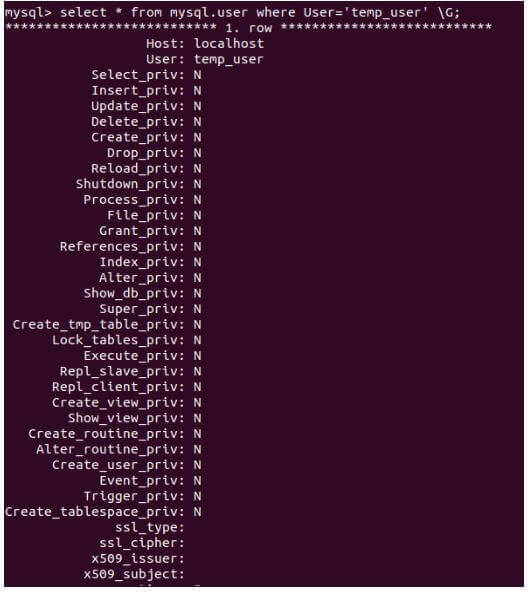
We can see that all the columns ending with _priv that represent the privileges granted to the user for temp_user user have the value N that stands for No which means that no privilege for that operation is assigned to the user.
Example #2
Here we will grant some privileges to the temp_user table by using the following GRANT query statement.
Code:
GRANT SELECT, INSERT, DELETE ON *.* TO temp_user@'localhost';
We have assigned the SELECT, DELETE, and INSERT privileges on all the tables of all the databases to the temp_user.
Output:

Example #3
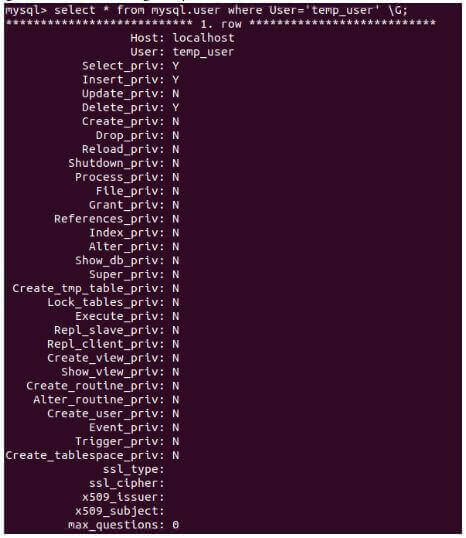
Now, let us check if all the privileges are assigned after firing the following command.
Code:
FLUSH PRIVILEGES;
Output:

Code:
select * from mysql.user where User='temp_user' \G;
Output:
Example #4
Let us check the authentication string that is the encrypted password that is stored for temp_user by using the following query statement.
Code:
select authentication_string from mysql.user where User='temp_user' \G;
Output:

Example #5
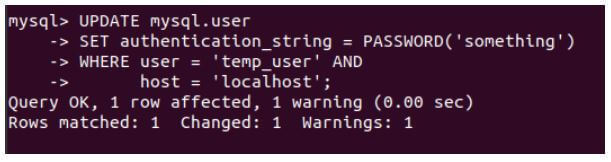
Let us alter the authentication string by changing the password using the following query statement.
Code:
UPDATE mysql.user
                SET authentication_string = PASSWORD('something')
                WHERE user = 'temp_user' AND
                host = 'localhost';
Output:
Example #6
Let us flush the privileges by executing the flush command that gives the following output.
Code:
FLUSH PRIVILEGES;
Output:

Example #7
Let us now check the authentication string by retrieving it using the following query statement.
Code:
select authentication_string from mysql.user where User='temp_user' \G;
Output:

We can see that the previous and the present authentication string show a substantial difference in the encrypted string that is stored in it.
Previous authentication string: *8C6F5DC80B8E3EC9003B2666D8E2F89FFE0A15CD
Present authentication string: *88C89BE093D4ECF72D039F62EBB7477EA1FD4D63
Conclusion
We can make the changes that are made in the privileges to the user or the modification in the grant tables into effect by relading the grant tables into the memory. This can be done by either using the Flush Privileges command, mysqladmin flush-privileges or mysqladmin reload command to reload the grant tables in the memory. When the Grant command is used, there is no necessity to flush the privileges as MySQL automatically determines the changes and reloads grant tables. If the grant tables are modified by using the Insert, Update or Delete command then it is necessary to reload the grant tables by executing flush privileges command to take the changes into effect.
Recommended Articles
This is a guide to MySQL Flush Privileges. Here we discuss the introduction to MySQL flush privileges, working, and examples respectively. You may also have a look at the following articles to learn more –
- MySQL Timestamp
- MySQL Database Repair
- ROLLUP in MySQL
- MySQL Constraints
Mysql Grant Privileges to One Database
Source: https://www.educba.com/mysql-flush-privileges/
0 Response to "Mysql Grant Privileges to One Database"
Post a Comment